The world's coolest Laptop

Computing technology

The perfect UI for a logon screen

Communications has made our world tiny

Cant live without one

Saturday, December 15, 2012

Skechifi


Privacy Policy:


All the data is stored within the phone unless and until user selects to transmit to Facebook via Share to Facebook option provided. Location data is traced if and only if the user tap's trace current location button (choose from map page). It is used solely for the purpose of grabbing the Map's Picture in and around the user's location so that the user can sketch on it. It is not transmitted to anywhere in any form.

Terms of service:
 

Application [skechifi] or its developers cannot be held responsible for any loss,damage caused to the user in any form. The application is purely intended for the purpose of entertainment and nothing else.

Friday, November 23, 2012

Scrollable Textbox Silverlight/WP7

I was doing an Application that required a Scrollable TextBox. Unfortunately the textbox that is available via the default WP7 controls is not scrollable. Naturally, i was looking for alternative controls/workarounds. But this time Googling did not work. There wasn't any decent work around available. I was about to quit doing the application, but thanks to a friend of mine i didn't. He found of a work around for this :) (had the eureka feeling :P ). OK enough story, lets get down to business.

Solution: 

Key thing: Set the height of the texbox to Auto, attach a scrollviewer to it & enclose it inside a grid.

By scrollable textbox generally, we mean that the container inside the textbox control (that holds the text) should be scrollable. Instead of that, what we are going to do is set the height of the textbox to "Auto" and put it inside a stackpanel and attach a scrollviewer to this textbox. The idea here is that, instead of moving the container that holds the text, we are moving the entire textbox. Since the height is set to auto, the textbox height extends automatically. To give the user an effect thats is similar to scrolling textbox, it should be enclosed inside a grid. The grid's dimensions should match that of the required textbox.

Code:

<Grid Height="390" HorizontalAlignment="Left" Margin="140,42,0,0" x:Name="grid1" VerticalAlignment="Top" Width="478"  >
            <ScrollViewer VerticalScrollBarVisibility="Auto" >
                <StackPanel Width="469">
                <TextBox AcceptsReturn="True" x:Name="ScrollableTextBox" Height="Auto" MinHeight="320" Width="454" TextWrapping="Wrap"/>
                </StackPanel>
            </ScrollViewer>

            </Grid>

 
Catch:

The catch in this solution is that, as the user keeps typing in and the textbox is just about to extend beyond the region of visibility, the textbox doesn't automatically scroll. The user has to use the scroll gesture and manually pull it up. An alternative is to (Though i haven't tried this) use the Height changed event of the textbox and when it crosses the threshold, programatically scroll up.This would give the feel of a proper Scrollable Textbox.

Hope this solution helped :) 


Friday, March 23, 2012

How to design a great Ui

This blog post is some what different from my regulars. I am going to share my views on how to design a great UI. Primarily I will be focusing on Windows and Windows phone based applications but this can be applied to other types also.  This post is not for professionals. Its for amateurs who are just getting into programming. I am an amateur myself and I don’t claim that this blog post is perfect. It’s the guidelines that I chose to follow.

Most of the applications I have seen possess robust functionality, but they fail to impress the user simply because the UI isn’t pleasing(often complicated) . Programmer’s often tend to give lesser importance to UI design.

1. Don’t be satisfied till you like it:Pointing up

Designing an UI is a tedious process. It involves a lot of imagination and lesser logic. But just because designing is a tedious process jus don’t leave it as such. If the creator doesn’t like it, the user is definitely not going to like it. Try putting in a lot of effort till you like it.

2. Colors: Rainbow

Play around with colors. Experiment with them, see how every color suits your application both background and foreground. But make sure you select those such that they form a great combination. Don’t choose colors that are flashy unless and until its for a specific purpose.

3. Background Picture :

If your application is going to involve a background pic, it is going to play a crucial role in the design. I have spent days finding the right background pic for my windows phone 7 applications. There are some rules while you are choosing the background pic. Don’t choose a background Pic just because the picture is great.  It should be chosen in such a way that the application theme, foreground and the control colors match. Another important thing is, even if the pic is great make sure it doesn’t hide any of your content. This can happen say, when the font is white and a small portion of the pic is white (obviously if both of them overlap).  Normally , an abstract pic is the best for a background.

                      
17

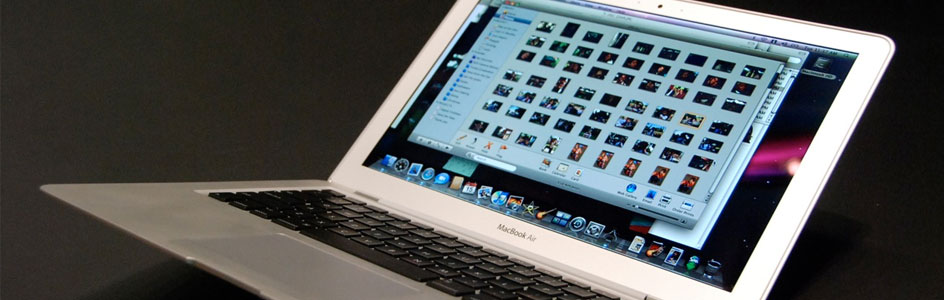
I used a simple stainless screen background to design an UI for my application – Med prompter pro.

4.Design tools:

Use design tools like Expression blend etc. for a rich UI. If you feel that expression blend and other software's can be complex try doing it with simple software's like paint and Microsoft Word. You can do a lot with the basic shapes in these applications. For example, in word take a rectangle go to format and fill it with a metallic blue.  You can then print screen this, crop the rectangle alone using paint and use it for various backgrounds.You can combine different shapes into one giving 3d effects to form a beautiful image and use to same process to create a stand alone picture. Its all left to your creativity. If you are looking for cheap alternatives try online editors like picknik or software's like GIMP,PAINT.NET

I designed the above pattern using Word really quick. All you need to need to do is make your imagination go crazy. This pattern I designed using a smart art list(with a single element) in a text box. I chose the color, selected the metallic design and rotated it. I created Multiple copies of the text box, arranged them properly. Then I printed the screen, pasted it in paint and cropped it properly.

5.Free pictures and icons:

Internet is a huge collection of resources. You can search the internet for free pictures and icons that suit your theme. You can use them legally in your application depending on the license terms. Download a lot of them, test them , play around with them , rotate them , combine them. You can use even Word to play around with them . Download an icon. Create a rectangle in word, fill it with a suitable color and place the icon in the middle! Print screen, copy paste in paint, crop to center. And there you go a simple picture with a nice background. 

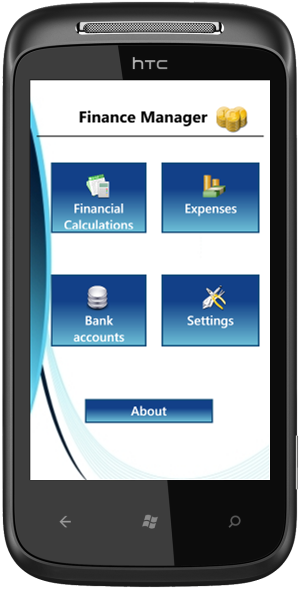
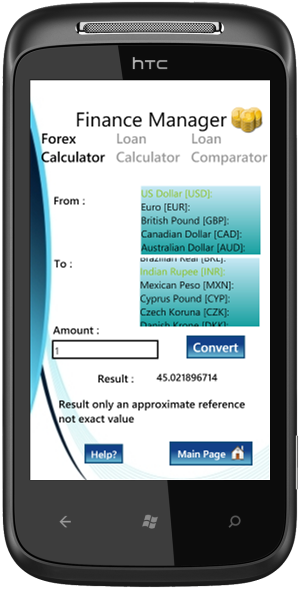
I have downloaded a free picture here. If you observe the background more closely, you will notice there is a beautiful pattern plus there is lot of space. This space can be used for displaying your content (Great for Pivot and Panaroma)


My favorite  source - for Pictures : http://www.freedigitalphotos.net  

                                      for icons :http://www.commons.wikimedia.org/wiki/Crystal_Clear

6. Get Inspired : Light bulb

Search of design samples based on the theme of the application. Make sure that UI is designed to match your theme. Get inspired by things like Metro design and AERO. They make your application feel really brilliant. If you think effects like AERO are complicated, there are always workaround’s (I have given one for transparency in my blog), try using those. I want to conclude my post saying keep your UI as simple as possible.

transparency: aero like effect–windows forms

The NEED:
For PC’s having Windows XP,98 it is not possible to bring in aero effects like Transparency. Since these operating systems don’t have sufficient resources, achieving both backward compatibility and superior aesthetics is going to be really difficult. Therefore workaround’s are the only option.
SMALL STORY:
I was designing a Windows form application – an assignment given by my professor. I wanted to make it backward compatible as he has a system running Windows XP. But I badly wanted to include the Glass effect (found in AERO), since I wanted my user interface  to look really beautiful. So I started looking for workaround’s. I did manage to find one(made me look like a complete idiot, since I couldn’t think of such a simple thing) . I am going to talk about the same in this blog post.
Prerequisites: Visual Studio
METHOD:
Consider a sample Windows 7 form:
It looks like this, completely opaque. To give it some Transparency, view the form’s design(Design view).  Click on the form ( such that the form gets selected not the controls inside the form) and view its properties ( You can do this by click the properties tab available on the right hand side of Visual studio or if its not present press CTRL + W,P). Now scroll down and find the property called Opacity. By default this will be set to 100%. Set this to 90%.
And there you go, you are done. Now press F5 and you can see your form having the beautiful transparency effect. You can adjust the value of opacity to vary the degree of transparency, but make sure you don’t increase transparency to an extent where content cannot be seen.
CONCLUSION:
You can see that the transparency effect has made the UI really better. Try changing the color that suits your application and transparency. This process makes the control’s inside the form(almost all) to exhibit transparency. This can be used in Windows 7 and vista also, if you think that using those Aero DLL’s is a tedious process.
Download the sample source code here. Here I have varied the transparency based on a track bar.

Saturday, February 18, 2012

Detect Alarm Entry–Wp7

If you  have used Alarms and Reminders in Wp7 Mango SDK, you will notice that reminders can be detected by having a separate page in the application. But unfortunately there is no such detection mechanism available for Alarms. By detection mechanism what I mean is that- the differentiation between the app launch due to alarm and manual launch. What if the developer wanted to do something after the alarm has occurred? how does he detect that? I had the same problem and I am going to share the work around here. Its not a perfect substitute and may not be valid for all cases.

Microsoft has made the detection mechanism for knowing whether an alarm has occurred- private.The variable called p_completed which shows the status cannot be accessed. So practically there is not much we can do.

Prerequisites:

  • You should be familiar with WP7 app development
  • You should know about alarms and reminders in WP mango. If you are not aware of it check out this link- code samples of WP7

So lets get started.

For the sake of demonstration I am going to first create an application that adds and alarm and also can detect  the same. So I open a new project, select Silverlight for windows phone 7 and load the project. Then drag and drop a button into the designer area. And place the following code in the click event. This is for creating a new alarm

try
            {
                Alarm a = new Alarm("first");
                a.BeginTime = DateTime.Now.AddSeconds(40);
                ScheduledActionService.Add(a);
            }
            catch
            {
                ScheduledActionService.Remove("first");


/*assuming that alarm already exists exception occurs due to that */

Alarm a = new Alarm("first");
a.BeginTime = DateTime.Now.AddSeconds(40);
ScheduledActionService.Add(a);
           }


I create an alarm object a with the alarm name as first. I set the begin time as 40 seconds from the current time. And I add it to the ScheduledActionService. I handle the exception that is caused if the alarm named first already exists by removing it first and then creating it again.

Now I am going to detect whether the alarm launch has occurred in the PhoneApplicationPage_Loaded a event handler of Main page. The code is as follows ::


try
           {
               ScheduledAction a1 = ScheduledActionService.Find("first");
               if ((a1.IsEnabled == true) && (a1.IsScheduled == false))
               {
                   MessageBox.Show("Alarm detected");
               }

ScheduledActionService.Remove("first");
           }
           catch
           {

           }

Now launch the application click add alarm and then close the application. Wait for the alarm pop up. Tap the pop up and there you go. Get a message saying that alarm is created.

How it works:

First I have declared an object a1 of schedule action and I pull the alarm first and store it in a1. This is done using ScheduledActionService.Find("first"). There are two key aspects to this. For an alarm to have occurred and after that the application is launched then the alarm must have been enabled but its not scheduled. So I check the above condition & then display a message saying alarm is detected. Now why did I add the remove alarm command. I do this because the next time the user launches the application manually, the state of alarm would be same. As I said earlier this work around is not a perfect substitute but can help sometimes. So you need to again create the alarm for the next use.

Bottleneck :

This workaround doesn’t work perfectly if the user clicks dismiss and then launches the application manually. In this case the application will say alarm is detected though its not the case

You can download the source code from here.

Monday, January 9, 2012

Buttons in Listbox–WP7

Its really wonderful and dynamic to have a button associated with every element of listbox. This is really advantageous if you running short of screen space (often the case in phone applications).

This is an extension of data binding techniques.But how do we know which element’s button is tapped because while defining the button using binding we give a single event handler. One more constraint not in many cases we will not know the number of items in the listbox. So lets see what can be done about this.
1[6]

Prerequisites:
  • You should be aware of the data binding techniques in WP7. If not please read my blog post on data binding to listbox in wp7
  • You should have basic understanding of wp7 app development
  • You should have the Windows phone 7 SDK installed
Here I am going to start from the point where I assume you have done data binding as I said in my data binding blog post. If not I would recommend you to download the source code from my previous blog and start off with that or if you are a Pro start of with from scratch.
Now in the listbox.itemtemplate tag I where we have add elements to define the structure of an item, add a button at the last in the textgrid. The code is
<Button Name="hello" Margin="0,100,0,0" Height="70" Content="Tap" />
Now select the button and goto the properties, select the events tab, and double click on the field besides the click ( Basically create an event handler for the click ). You will be redirected to the C# page. Come back to the XAML page. You should see the code of the button modified as follows..
<Button Name="hello" Margin="0,100,0,0" Height="70" Content="Tap" Click="hello_Click" />
Now the entire code of the item template will look something like this.
<ListBox Height="373" HorizontalAlignment="Left" Name="listBox1" VerticalAlignment="Top" Width="439" Margin="0,41,0,0">
<ListBox.ItemTemplate>
<DataTemplate>
<StackPanel Margin="-200,0,0,0" Name="masterpanel">
<StackPanel Width="100" Height="100" Margin="0,0,0,0" Name="imagepanel">
<Image Source="pic.png" Stretch="Fill" />
</StackPanel>
<Grid Margin="300,-100,0,0" Name="textgrid">
<TextBlock Text="{Binding name}" FontSize="25" Foreground="Gold"/>
<TextBlock Text="{Binding phone}" Margin="0,50,0,0" FontSize="25" Foreground="Gold"/>
<Button Name="hello" Margin="0,100,0,0" Height="70" Content="Tap" Click="hello_Click" />
</Grid>
</StackPanel>
</DataTemplate>
</ListBox.ItemTemplate>
</ListBox>


Alright. But still I have not told you the solutions for the constraints Lets get to that now. There is a property called the TAG associated with many elements and its also present for button. Now we are going to use this to know from which element the button was tapped.
Untitled[7]

As we can see first lets bind some data to the tag property. The data should be such that it should be unique to every element. Here I am going to bind the name. When I tap the button I will get a message displaying the name.
So first lets add Tag="{Binding name}" to the XAML code of the button. So the button code should be looking like this.
<Button Name="hello" Margin="0,100,0,0" Height="70" Content="Tap" Click="hello_Click" Tag="{Binding name}"/>

Now in the event handler where you add the items to the listbox and bind them ( in the previous blog post example it should be the event handler for the add button), the moment you add the tag gets associated with the button of that item.Here since I am using name that is already used in textblock the code is same. However if you would like to add something else make sure you add the property and make necessary modifications in the XAML code.

Now the next step is to retrieve the tag. Now this syntax is the key thing of the entire process. In the event handler hello_Click use the following code to retrieve the tag.
string name = (string)((Button)sender).Tag;
Basically we are typecasting the object sender into a button since its called from a button click and accessing the tag property and type cast the output to a string and then store it in the variable name.

Now we have retrieved the tag. Next step is to process and get the required output. Here my aim is restricted to just displaying the name of the item I call
So I am going to write the following code
MessageBox.Show("The name of the item you tapped is " + name);
So the event handler function hello_Click should have this code:
string name = (string)((Button)sender).Tag;
MessageBox.Show("The name of the item you tapped is " + name);


So that’s it. Launch the application tap on the button in every item and notice the output.
3[3]

You can download the source code from here.

Sunday, January 8, 2012

Ultimate alarm pro


Ultimate alarm pro an Alarm and reminder application application built for WP7.5 .I am going to describe something about this application.

Ultimate alarm pro has some incredible features that no other alarm application has for wp7. It is built using silverlight and C#. Some of the features of this application are as follows:
Pop up alarms : When you set an alarm a Pop up comes up playing the alarm tone. Now if you tap the pop up it will take you to Today’s portfolio which has every feature that you require after an alarm.

Unlike many alarm applications that require you to keep the application open and keep the phone plugged in as it drains the battery this application does not require this. You can set the alarm and and close the application. So basically your BATTERY IS NOT DRAINED.


Sleep Timer

My favorite of all the features. Many of us want to listen to some music before going to sleep. Sometimes I jus sleep with music on and the next day morning I find there is nothing left in the battery. Very annoying. So here is sleep timer. Listen to the songs in your phone set a time and start the timer the application will automatically stop playing the music and exit. So again No BATTERY DRAIN

Wake up test:

Even if the alarm is there we just press something and go to sleep again. So here is wake up test. If you enable this feature from settings then the app will keep playing the alarm tone till you pass the wake up test. The test is that you have to enter a number that is displayed on the screen randomly in a small size. So its mandatory you wake up and enter the number.


Today’s Portfolio

Today’s portfolio is the page which displays everything you need after an alarm occurs:
  1. Weather and time : App reads the time and weather as soon as you come as soon as you tap the pop up (If you have enabled it). Weather is got using yahoo weather api.
  2. Calendar entries : It displays the calendar entries of that day since you may want to have a look at what’s lined up for that day
  3. News : Read the headlines offered by Bing  Top 10 headlines are displayed her.
  4. Alarm associated reminders : Sometimes we need to do something important the next and definitely we don’t want to forget that. So while setting the alarm tap on the associate a reminder and that will be displayed as a message here. So with this you are permitted to forget it as the app will remind you
That’s not all there is a lot more.

Favorite alarms

You can set a favorite alarm within 2 taps after you enter the app. A favorite alarm is remembered by the app always. You can use favorite alarms for the alarm like the ones you use regularly ( time of getting up in the morning etc). Maximum of 3 favorite alarms can be set.


You can also make the application read the weather and time in FIVE LANGUAGES
  1. English
  2. French
  3. German
  4. Spanish
  5. Italian
A lot more small features are also there like timed alarm etc. Check it up in the marketplace do rate the application.
market

Med Prompter Pro


Med prompter is a medicine reminder application. It’s a simple utility presented with an incredible user interface,

Some of the features of this application are as follows

Reminder for each dose of each medicine:


You can setup reminders for every dosage of each medicine. The reminders are set for the time you wish to take your medicines. If you tap the reminder pop up( as in the pic on the left) the medicines that are to taken that time are displayed as a list (picture on the right)

Flexibility with the medicine dosage:


Medicine entry is made very flexible with the timings and the days is left to the user. This is very flexible compared to some similar applications where this flexibility is not given and the user is forced to get reminded about applications when he doesn’t require; for example some applications force the user with options like alternate days, once a week and stuff. Where as in this application user can choose any day he wants and any pattern.


Type of medicine:

The type of medicine is displayed in the list through a picture like the one shown in the first picture. Five types of medicines are supported:
  1. Pill
  2. Cream
  3. Liquid
  4. Drops
  5. Inhalational


Details of your medicine is stored:

Forgot to take the prescription to the drug store? Don’t worry you can retrieve the major details from this application. The details like the name, amount , type , total amount of medicine is permanently stored unless you chose to delete that.


Refill Prompter:

A refill alert is shown when your medicine starts to run out with a small symbol, This is calculated based on the input given by you ie., the amount taken per dose and the total dose available with you. If it starts to become less than 10% then a refill alert is shown in the app’s main page and the page when that particular medicine is reminded.


Lot more small features like when is the next dose,call doctor, help in every page etc. is there in the app . Check it out and do rate it.

market

Insurance emergency assistance


Insurance emergency assistance is an app that is used to manage insurance policies and to get the services specific for insurance during emergency.This application is built using Silverlight and C#.


During emergency , say if a car accident occurs we normally tend to forget the number of the insurance fellow, policy details etc. Next, you have to run behind him submit proof etc and then claim the damage cost.

Now with this application all the services that are required when an emergency occurs is present. You can store the phone number or mobile number or email of the insurance company or agent. During emergency all you need to do is select the policy that you stored previously and call or message or email.

The SMS and EMAIL functionality will automatically pop up the a default sms with the policy details as well as your location. This also helps you to produce additional proof for the accident or what ever emergency situation.

Now that’s not all. There is more to this application. It also helps you manage insurance policy ie., an insurance manager.

You don’t need to run behind papers everytime for your policy details. You can store the details of all your policies in this application retrieve it whenever you want. Also it has an inbuilt function to remind you of the due date of all the policies and display an alert if the policy crossed the due date.

market

A lot more small features included in the application. Check it out in the market place .Do rate the application.

Finance Manager beta


Finance manager beta is an application i have designed for windows phone 7. I have given a brief summary of the app here. Check it out.


Finance Manger beta is an app that helps in financial management needs on the go. Combined with an user friendly interface the functionality of the app includes calculations related to loans, expense tracking and much more. 
 Some of the main features  are discussed here:

1.       Financial Calculations :

a.       Loan Calculator: Loan calculator is a feature which gives user everything he needs to need to know about loan. It can calculate

                                                               i.      EMI

                                                             ii.      Principal for every installment

                                                            iii.      Balance after every installment

                                                           iv.      Interest for every installment

b.       Loan comparator: Loan comparator helps the user to compare two loans. It can simultaneously present the user with the EMI, Annual difference, Monthly difference for both the loans enabling the user to identify which is suitable to his/her needs.

 
c.       Forex Calculator: Forex calculator converts the money equivalent of one currency to other. It has support for about 38 major currencies in the world. The results of the calculator are approximate values to aid the user in approximate foreign exchange calculations even if the user is devoid of access to internet.
1.    Expenses :
Finance manager beta gives an entirely new dimension to expense tracking. With this the user can instantly update his expenses, thus the traditional problem of forgetting the expenses is no more.  


As quoted earlier user friendliness is the main aim of this app. The page provides exclusive access for the user to input that particular day’s expense directly through quick feed today’s expense and view them using view todays expenses so that the hassle in selecting the date and then navigation.
 
a)    Expenses management: Expense management is very much easier with finance manager beta. It presents the user with the expenses in a variety of ways. The user has also the option of adding new expenses, editing previous expenses even for the previous days. Above all It categorizes the expenses.
b)    Report: Finance manager beta also generates report for every month. It presents the user with a bar graph with different categorical expenses and the total expenses. The user can also view categorical expenses separately for that month (by clicking bar Corresponding to that category) so that he can identify the area where maximum expense occurs

 
c)    Search : If the user forgets which date the expense was made, the details can always be retrieved using the description that was provided earlier while feeding the expense.


d)    Cash in Hand feature: The cash in Hand refers to the amount of liquid cash one has. It is updated in real time as the expense is made or if withdrawal or deposit is done. It helps the user to match the cash in hand in the app and his actual value. This enables the user to know the present status, find if some expense has been missing from record etc.


.


3.Bank accounts :
         Bank accounts is a small feature that helps the user in tracking the balance of all the bank account one has. This removes the hassle of referring several documents and asking the bank representatives and other means for getting the balance particularly if one has multiple bank accounts. 
 

Additional Features:
1.   Password Protection: Password protection is given for this app. This makes sure that nobody other than the user of this app has access to the financial data. The user has also got options to change or disable the password option and re enable as one wishes to.
2.  Customized Help: User friendliness is one of the important parameters that was considered while developing the app. But still if the user has some difficulty there is always help given in almost all the pages giving descriptions and information about the functionality of that feature. This enables the user to understand the feature of the app then and there.


Comments and suggestions are welcome. Please note that the app is in beta stage and there are chances of bugs being there.

The legal details document can be downloaded from my skydrive. Click on the following folder to access my public skydrive and click legal details to download them